Bill Calfee
Gun Fool
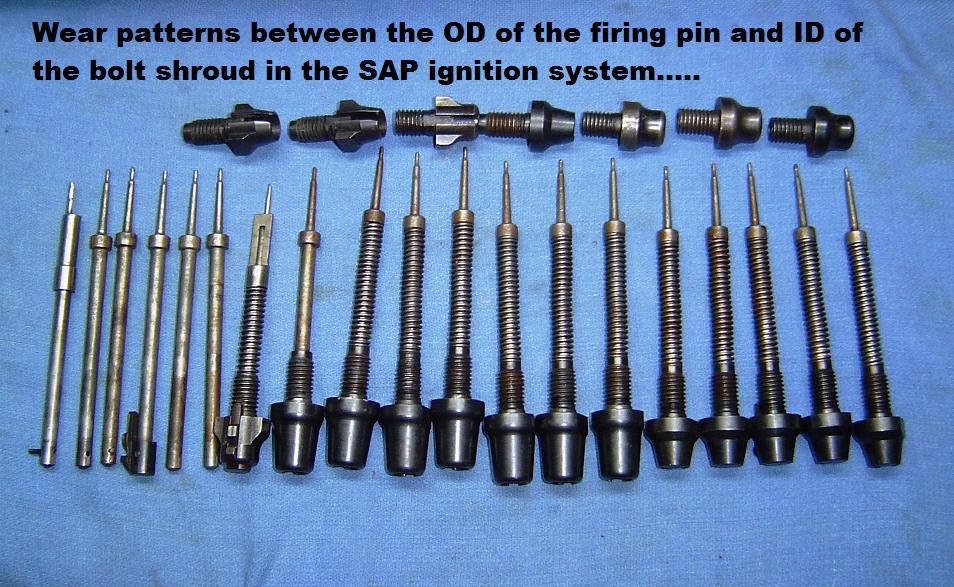
Wear patterns......
CYA friends:
During my 2-1/2 hour conversation with a RFBR action maker a few days ago, about a properly executed, MD-PAS triple, for the masses, I suggested a radical departure from the existing Turbo Class Actions.........
This "radical" departure is really not radical, in a way..................I'll leave it at that...for now.
Anyway, no SAP rimfire ignition system has the uniformity of ignition as does a well blueprinted, MD-PAS system...
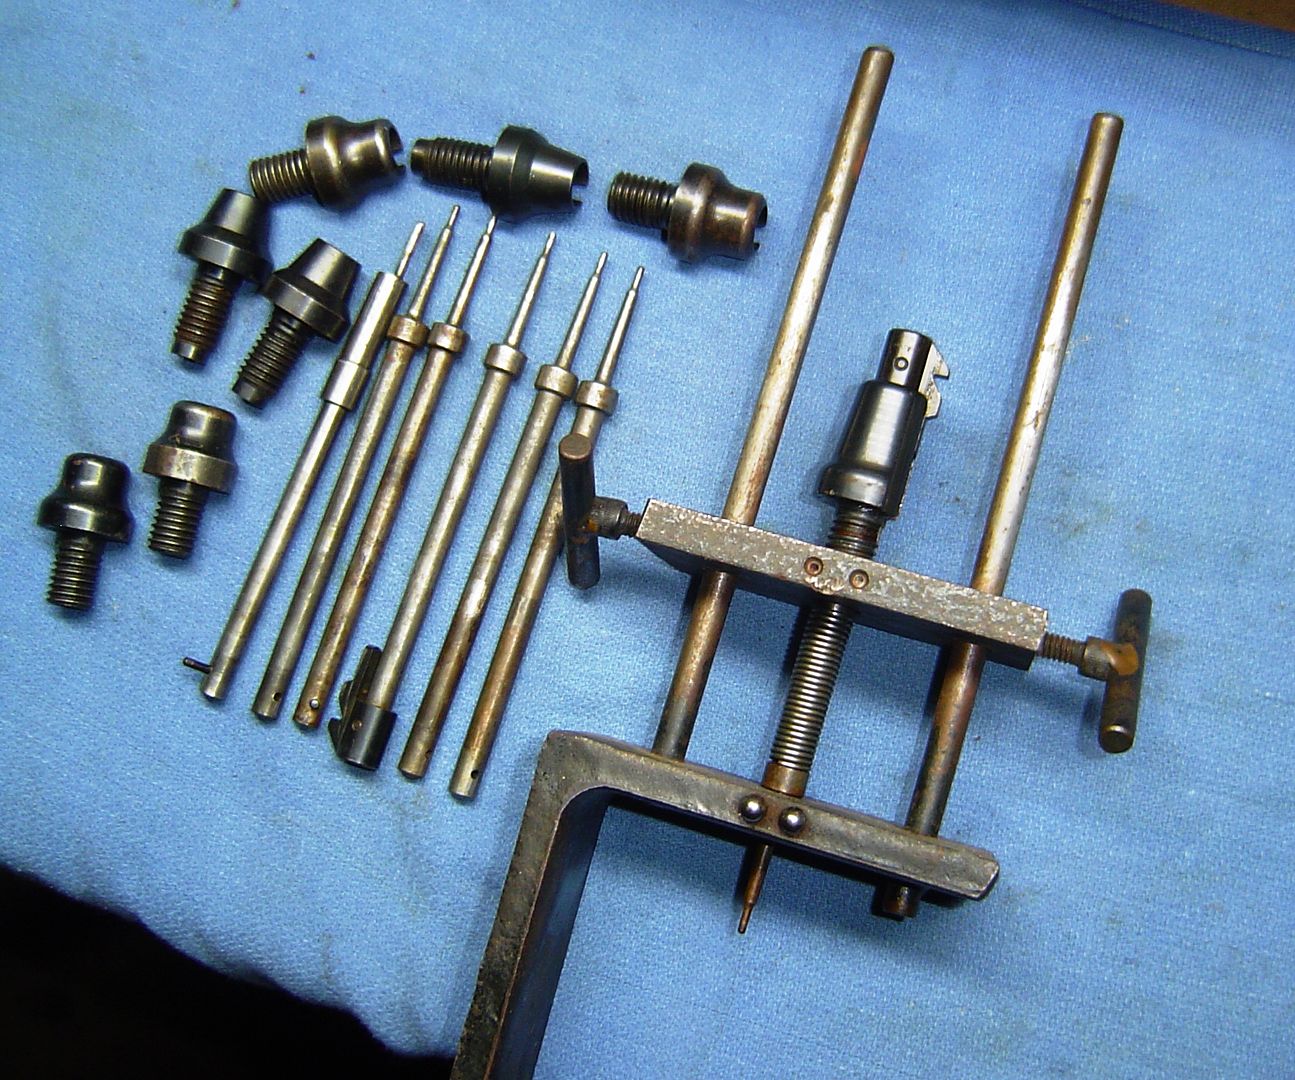
So today I decided to explore the wear patterns of the SAP ignition system, as pertains to the firing pin passing through the bolt shroud.
Exactly how does the OD of the firing pin body, and, the ID of the bolt shroud wear, in a SAP system?
And what an eye opener. ( No wonder SAP rimfire ignition doesn't produce ignition uniformity like a well blueprinted, MD-PAS system.
________________________
I've spent this day tearing down and inspecting a bunch of SAP, Remington ignition firing pins and bolt shrouds, both centerfire and rimfire for their wear patterns.
(By the way, 95% of all rimfire SAP ignition is based on the Remington SAP ignition system......)
More later......as this is so important for the future of rimfire accuracy...
Your friend, Bill Calfee
_____________________________
PS:
CYA friends, even me, after all these years, knowing that SAP rimfire ignition doesn't produce ignition uniformity like well blueprinted, MD-PAS ignition, even I was surprised at the wear patterns between the firing pin and the ID of the bolt shroud in the SAP ignition system....
And I've been doing this for the last 30 years..
______________________________________
CYA friends:
During my 2-1/2 hour conversation with a RFBR action maker a few days ago, about a properly executed, MD-PAS triple, for the masses, I suggested a radical departure from the existing Turbo Class Actions.........
This "radical" departure is really not radical, in a way..................I'll leave it at that...for now.
Anyway, no SAP rimfire ignition system has the uniformity of ignition as does a well blueprinted, MD-PAS system...
So today I decided to explore the wear patterns of the SAP ignition system, as pertains to the firing pin passing through the bolt shroud.
Exactly how does the OD of the firing pin body, and, the ID of the bolt shroud wear, in a SAP system?
And what an eye opener. ( No wonder SAP rimfire ignition doesn't produce ignition uniformity like a well blueprinted, MD-PAS system.
________________________
I've spent this day tearing down and inspecting a bunch of SAP, Remington ignition firing pins and bolt shrouds, both centerfire and rimfire for their wear patterns.
(By the way, 95% of all rimfire SAP ignition is based on the Remington SAP ignition system......)
More later......as this is so important for the future of rimfire accuracy...
Your friend, Bill Calfee
_____________________________
PS:
CYA friends, even me, after all these years, knowing that SAP rimfire ignition doesn't produce ignition uniformity like well blueprinted, MD-PAS ignition, even I was surprised at the wear patterns between the firing pin and the ID of the bolt shroud in the SAP ignition system....
And I've been doing this for the last 30 years..
______________________________________
Last edited: